How to Make the Perfect Key Lime Pie from Scratch
Have you ever craved that perfect balance of tangy and sweet in a dessert that melts in your mouth? The iconic Key Lime Pie offers just that – a refreshing, zesty experience that’s surprisingly simple to create at home. This classic dessert recipe features a buttery graham cracker crust topped with a silky, citrus-infused filling that strikes the perfect balance between sweetness and acidity. Let’s explore how to craft this beloved American classic in your own kitchen.
Ingredients & Kitchen Tools
For the Graham Cracker Crust:
– 1½ cups graham cracker crumbs (about 12 full crackers)
– ⅓ cup granulated sugar
– 6 tablespoons unsalted butter, melted
– Pinch of salt (enhances flavor contrast)
For the Key Lime Filling:
– 4 large egg yolks (room temperature for better emulsion)
– 1 can (14 oz) sweetened condensed milk
– ½ cup fresh Key lime juice (regular lime juice works as a substitute)
– 1 tablespoon lime zest (for enhanced aroma)
For the Whipped Cream Topping:
– 1 cup heavy whipping cream
– 2 tablespoons powdered sugar
– ½ teaspoon vanilla extract
Kitchen Tools Required:
– 9-inch pie plate (preferably glass for even heating)
– Mixing bowls (various sizes)
– Electric mixer or whisk
– Microplane or zester
– Citrus juicer
– Measuring cups and spoons
– Rubber spatula
– Cooling rack
Prep Time & Cooking Schedule

– Prep Time: 20 minutes (includes creating crust and preparing filling)
– Baking Time: 15-17 minutes for crust, 15-17 minutes for filling
– Cooling Time: Minimum 3 hours, preferably overnight
– Total Time: 4 hours (including minimum cooling time)
This recipe works perfectly for make-ahead situations. You can prepare it the day before serving for optimal flavor development.
Step-by-Step Instructions
1. Preheat your oven to 350°F (175°C) and position the rack in the center.
2. Prepare the crust by combining graham cracker crumbs, sugar, and salt in a medium bowl. Pour in melted butter and mix until the texture resembles wet sand.
3. Press the mixture firmly into your pie plate, creating an even layer on the bottom and up the sides. Use the bottom of a measuring cup for a smooth, compact crust.
4. Bake the crust for 8-10 minutes until lightly golden. Cool completely on a wire rack.
5. Reduce oven temperature to 325°F (165°C).
6. Make the filling by whisking egg yolks until they lighten in color (about 2 minutes). This crucial step creates the perfect Key Lime Pie texture and helps incorporate the dessert recipe‘s signature tangy flavor.
7. Gradually whisk in condensed milk until smooth and slightly thickened.
8. Add lime juice and zest, stirring until well combined. The mixture will thicken slightly due to the acid in the lime juice.
9. Pour filling into the cooled crust and smooth the top with a spatula.
10. Bake for 15-17 minutes until the center is set but still slightly jiggly.
11. Cool completely at room temperature, then refrigerate for at least 3 hours or overnight.
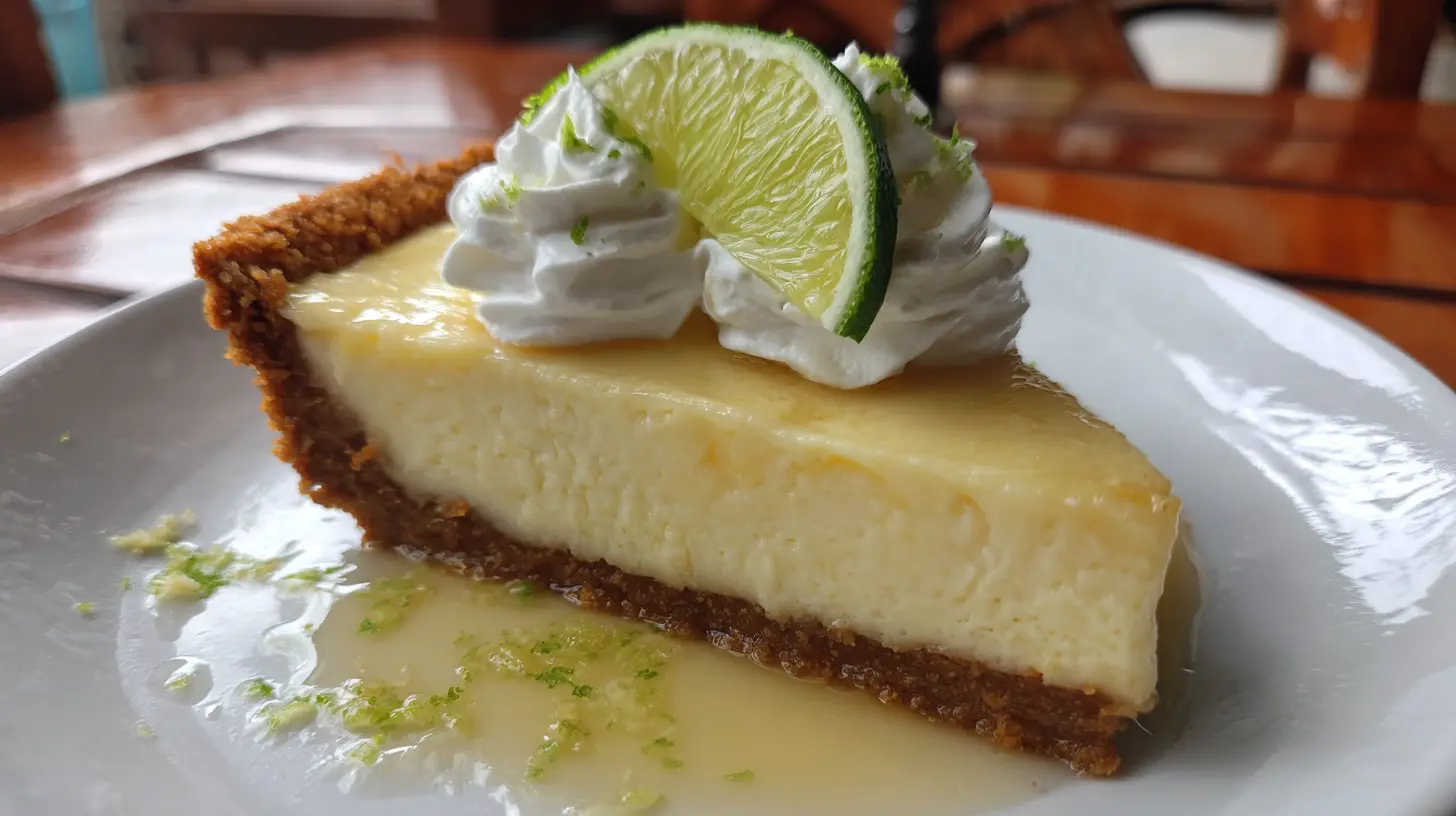
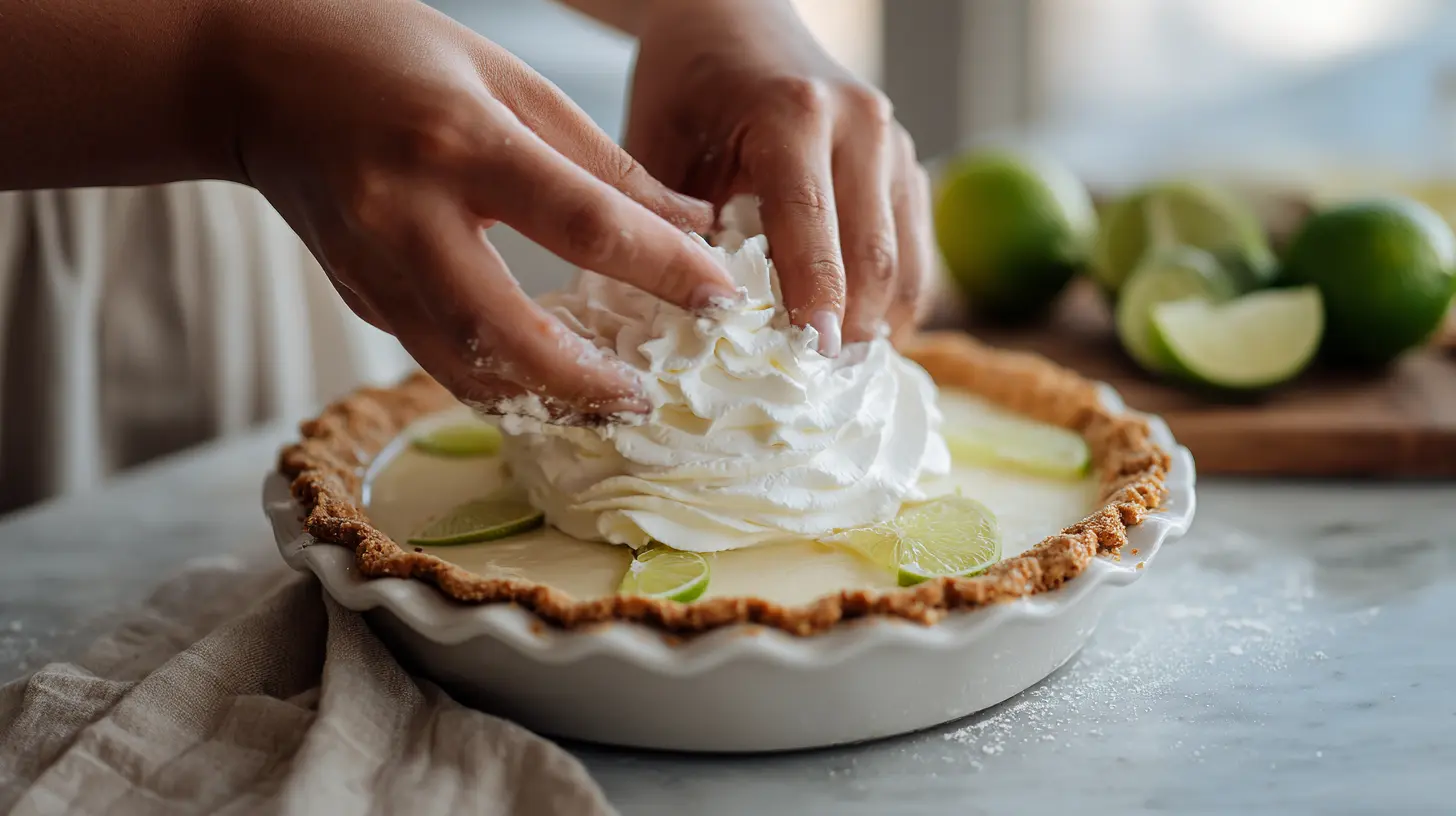
12. Before serving, whip the cream with powdered sugar and vanilla until soft peaks form. Top the pie with whipped cream and garnish with lime zest or thin lime slices.
Nutritional Benefits & Advantages
This citrus-forward dessert offers several nutritional benefits:
– Vitamin C from fresh lime juice boosts immunity
– Calcium from condensed milk supports bone health
– Protein from egg yolks provides essential amino acids
– Antioxidants in lime zest help fight free radicals
– While indulgent, a small slice makes a satisfying treat with approximately 350 calories per serving
Tips, Variations & Cooking Advice
– Authentic vs. Convenient: True Key limes are smaller and more aromatic than regular Persian limes, but regular limes work well too
– Make it tropical: Add 1/4 cup toasted coconut to the crust mixture
– Dairy-free option: Use coconut cream instead of heavy cream for topping
– Mini pies: Prepare in a muffin tin with liners for individual servings
– Freezer-friendly: For a refreshing summer treat, freeze slices for 2 hours before serving
Common Mistakes to Avoid
1. Overbaking the filling: This causes cracks and a rubbery texture. Remove from oven when center is slightly jiggly.
2. Using bottled lime juice: The artificial taste significantly affects quality. Always use fresh-squeezed for authentic flavor.
3. Under-chilling: Rushing the cooling process results in a runny filling that doesn’t slice cleanly.
4. Overmixing the filling: This introduces air bubbles that can cause cracks during baking.
Storage & Meal Prep Tips
– Refrigeration: Cover with plastic wrap and refrigerate for up to 3 days
– Freezing: Wrap tightly in plastic wrap and aluminum foil; freezes well for up to 1 month
– Topping: Add whipped cream just before serving, not during storage
– Transport tips: Chill thoroughly and transport in a cooler for picnics or gatherings
Conclusion
The timeless appeal of Key Lime Pie lies in its perfect balance of sweet and tart flavors, making it a refreshing finale to any meal. This classic dessert recipe combines simple ingredients into something truly extraordinary. With our detailed instructions and troubleshooting tips, you’re well-equipped to create this citrus masterpiece in your own kitchen. Whether for a special occasion or weekend treat, this pie is sure to impress family and friends with its bright flavors and silky texture.
FAQs
Can I use regular limes instead of Key limes?
Yes! While Key limes offer a more distinctive aromatic quality, regular Persian limes make an excellent substitute. You’ll need about 4-5 regular limes to get the required juice amount.
Why did my filling not set properly?
This typically happens when the egg yolks aren’t whisked enough before adding other ingredients or when the pie isn’t chilled sufficiently. Ensure you whisk yolks until light and chill for at least 3 hours.
Can I make this pie without condensed milk?
Traditional Key Lime Pie relies on condensed milk for its texture and sweetness. For alternatives, consider recipes specifically designed to use heavy cream or cream cheese instead.
Is it necessary to bake this pie?
Yes, baking is essential as it cooks the egg yolks, which thickens the filling and makes it food-safe. No-bake versions typically use different ingredients.
How do I know when my pie is perfectly baked?
The pie is done when the edges are set but the center still has a slight jiggle when gently shaken. It will continue to set as it cools.
Best way to grow Key Lime Pie in 5 steps
Ingredients
Equipment
Method
- Preheat your oven to 350°F (175°C) and grab a 9-inch pie plate. This initial step ensures your oven is ready for baking and your pie has a home.
- Combine graham cracker crumbs, sugar, and melted butter in a bowl, then press this mixture firmly into the bottom and up the sides of your pie plate. Bake this crust for 7-10 minutes until it's lightly golden, then set it aside to cool completely.
- In a medium bowl, whisk together egg yolks, sweetened condensed milk, Key lime juice, Key lime zest, and a pinch of salt until well combined and smooth. This creates the creamy, tangy core of your pie.
- Pour the prepared Key lime filling into your cooled crust. Bake for 12-15 minutes, or until the center is just set but still slightly wobbly. Avoid overbaking to maintain the pie's creamy texture.
- Let the pie cool to room temperature, then place it in the refrigerator for at least 2-4 hours, or preferably overnight; chilling solidifies the filling and enhances the flavors. Garnish with whipped cream and lime slices before serving for an extra touch.