Why This Sweet and Savory Honey Garlic Shrimp Deserves a Spot in Your Weekly Rotation
Have you ever craved a restaurant-quality meal that comes together in less time than it takes to order takeout? That’s exactly what you get with this Honey Garlic Shrimp. It strikes that perfect balance between sticky-sweet glaze and savory umami, all while requiring minimal cleanup. More importantly, preparing this dish at home lets you control the quality of ingredients, adjust the sweetness to your preference, and avoid the preservatives often found in takeout versions. If you have been searching for a foolproof honey garlic shrimp recipe that delivers consistent results, you have just found it.
Ingredients & Kitchen Tools
Here is everything you will need to create this dish, along with practical notes for substitutions:
– Large raw shrimp (peeled and deveined): 1 lb (21–25 count). Tail-on adds visual appeal and grip. If using frozen, thaw overnight in the fridge.
– Honey: 3 tablespoons. Raw honey adds floral notes; clover honey is milder. Not suitable for vegans—swap for agave or maple syrup.
– Garlic: 4–5 cloves, minced. Fresh is non-negotiable for authentic flavor. Jarred minced garlic may turn bitter when cooked.
– Soy sauce (or tamari): 2 tablespoons. Provides salty backbone. Use coconut aminos for a soy-free option.
– Unsalted butter: 1 tablespoon. Adds richness. Vegan butter or ghee works.
– Olive oil or avocado oil: 1 tablespoon, for searing.
– Red pepper flakes (optional): ¼ teaspoon, for heat.
– Salt and black pepper: To taste.
– Fresh parsley or green onions: For garnish.
– Kitchen tools: Large skillet (non-stick preferred), mixing bowl, whisk, measuring spoons, tongs.
Prep Time & Cooking Schedule

– Prep time: 10 minutes (mince garlic, whisk sauce, pat shrimp dry).
– Cook time: 8 minutes total of 5–6 minutes once the skillet is hot.
– Total time from start to plate: 15 minutes. The shrimp sauce comes together quickly, so have all ingredients measured and ready before you begin cooking.
Step-by-Step Instructions
1. Prepare the sauce: In a small bowl, whisk together honey, soy sauce, and red pepper flakes. Set aside.
2. Season the shrimp: Pat the shrimp completely dry with paper towels (moisture prevents browning). Season lightly with salt and pepper.
3. Sear the shrimp: Heat olive oil in your skillet over medium-high heat until it shimmers. Add shrimp in a single layer—do not crowd the pan. Cook 1–2 minutes per side until opaque and slightly charred at the edges. Remove shrimp to a plate.
4. Build the glaze: Reduce heat to medium-low. Add butter to the empty skillet. Once melted, add minced garlic and stir constantly for 30 seconds until fragrant seconds. Avoid browning the garlic—it will turn bitter.
5. Combine and coat: Pour the honey-soy mixture into the pan. Let it bubble gently for 1 minute until slightly thickened and syrupy. Return the shrimp to the skillet. Toss with tongs until each piece is evenly glazed. This final step is where the Honey Garlic Shrimp comes to life—the glaze clings to the crevices for maximum flavor. If you are following a good honey garlic shrimp recipe, this is the moment to watch for the sauce to coat the back of a spoon.
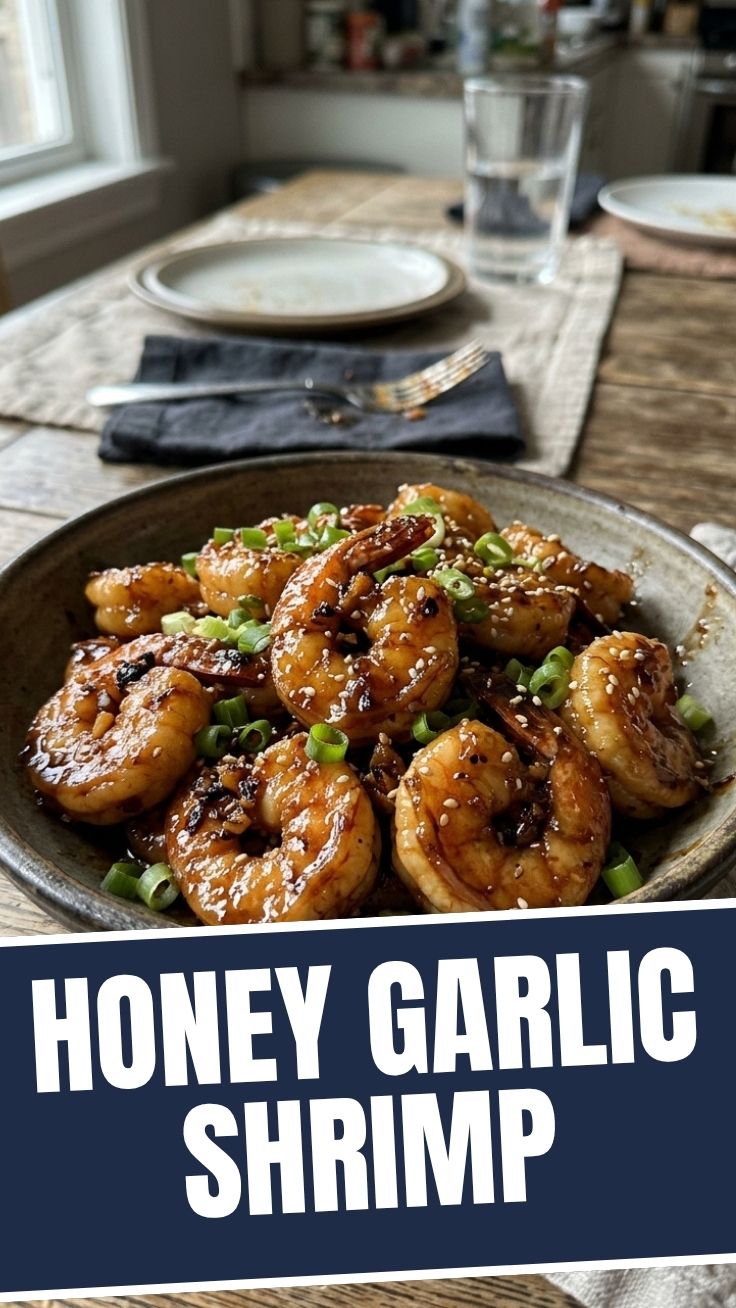
6. Serve immediately: Transfer to a serving dish, garnish with parsley or sliced green onions, and serve over steamed rice or with crusty bread to soak up the sauce.
Nutritional Benefits & Advantages
Shrimp is an excellent source of lean protein, providing about 20 grams per 3-ounce serving while being low in saturated fat. It also supplies selenium (an antioxidant mineral), vitamin B12, and iodine, which supports thyroid health. The honey adds quick-digesting carbohydrates, making this an ideal post-workout meal that replenishes energy. The garlic component offers allicin, a compound linked to immune support and reduced inflammation. Because the dish uses minimal oil and relies on natural sweetness, it fits well within balanced eating plans—especially when paired with vegetables or whole grains.
Tips Variations & Cooking Advice
– Make it spicier: Add ½ teaspoon sriracha or a pinch of cayenne to the sauce.
– Go gluten-free: Swap soy sauce for tamari or coconut aminos. Ensure any rice used is certified gluten-free.
– Add vegetables: Toss in snap peas or bell pepper slices during the last minute of cooking.
– Swap the protein: Chicken breast cut into bite-sized pieces works but requires 4–5 minutes extra. For tofu, press and pan-fry until golden before glazing.
– Air-fryer cooking method: Cook shrimp on a sheet pan at 400°F (200°C) for 6–8 minutes, then toss with prepared glaze.
– Control sweetness: Reduce honey to 2 tablespoons if you prefer a more savory profile.
Common Mistakes to Avoid

– Overcooking shrimp: Shrimp turn rubbery when cooked beyond the point of curling into a tight C shape. Remove from heat as soon as they turn opaque and just begin to curl.
– Skipping the pat-dry step: Wet shrimp steam instead of sear, resulting in a gray, water-logged texture.
– Adding garlic too early: Garlic burns at high heat. Always reduce the heat to medium-low before adding it to the butter.
– Crowding the pan: Overlapping shrimp trap steam. Cook in batches if needed.
– Ignoring sauce thickness: The glaze should be syrupy—not watery. Let it bubble until it visibly reduces before returning shrimp to the pan.
Storage & Meal Prep Tips
Store leftover shrimp in an airtight container in the refrigerator for up to 2 days. The glaze may thin out upon reheating. To restore texture, reheat in a skillet over medium heat for 1–2 minutes, adding a splash of water if the sauce sticks. Avoid microwaving directly, as it can make shrimp rubbery. Freezing is not recommended—the texture degrades noticeably. For meal prep, prepare the sauce and peel the shrimp in advance, but cook only when ready to serve to ensure peak quality.
Conclusion
This quick, balanced dish proves that impressive meals don’t require hours of effort. The Honey Garlic Shrimp offers restaurant-level flavor with minimal ingredients, while the honey garlic shrimp recipe we covered is forgiving enough for weeknight cooking yet elegant enough for guests. Try it once, and you will likely keep the glaze ingredients stocked in your pantry at all times. Share a photo of your results or tag someone who loves shrimp but rarely cooks it at home—they will thank you.
FAQs
Can I use pre-cooked frozen shrimp?
Yes, but thaw completely first. They require less than 1 minute per side—just enough to warm through and glaze. Overheating pre-cooked shrimp doubles their chance of becoming tough.
What can I substitute for honey?
Agave nectar, maple syrup, or brown rice syrup work in equal amounts. Note that the flavor profile will shift slightly (maple adds woody notes, agave is milder).
The sauce seems too thin—how do I fix it?
After adding the shrimp, let the pan bubble for an additional 30–45 seconds without stirring. The natural sugars will concentrate into a thicker glaze. Do not add cornstarch; it dilutes flavor.
Can I make this dairy-free?
Absolutely. Replace butter with a high-quality extra-virgin olive oil or a plant-based butter alternative (like Miyoko’s or Earth Balance). Avoid miso-based vegan butters, as they add unwanted saltiness.
Why is my garlic bitter?
Bitter garlic results from browning it over high heat. Always lower the flame to medium-low before adding garlic to the butter or oil, and stir it constantly for no more than 30 seconds.
Quick way to grow honey garlic shrimp 5 ways
Ingredients
Equipment
Method
- In a medium bowl, combine honey, soy sauce, minced garlic, olive oil, and red pepper flakes (if using) to create the honey garlic sauce. Add the peeled and deveined shrimp to the bowl, toss to coat evenly, and let it marinate for at least 15 minutes to absorb the flavors.
- Heat butter in a large skillet over medium-high heat. Add the marinated shrimp in a single layer and cook for 2-3 minutes per side until pink and opaque, ensuring not to overcrowd the pan.
- Preheat your oven to 400°F (200°C). Arrange the marinated shrimp in a single layer on a baking sheet, optionally adding lemon slices. Bake for 8-12 minutes, or until the shrimp are cooked through and turn pink.
- Thread the marinated shrimp onto soaked wooden skewers. Grill over medium-high heat for 2-3 minutes per side, brushing with any remaining marinade, until the shrimp are cooked and slightly charred.
- Heat a large wok or skillet with a little more olive oil over medium-high heat. Add broccoli florets and sliced bell pepper, stir-frying for 3-5 minutes until tender-crisp. Add the marinated shrimp and cook for another 3-5 minutes, tossing until the shrimp are pink and cooked through.
- Preheat your air fryer to 375°F (190°C). Lightly spray the air fryer basket with cooking spray, then arrange the marinated shrimp in a single layer. Air fry for 6-8 minutes, shaking the basket halfway through, until the shrimp are cooked and lightly crisped.