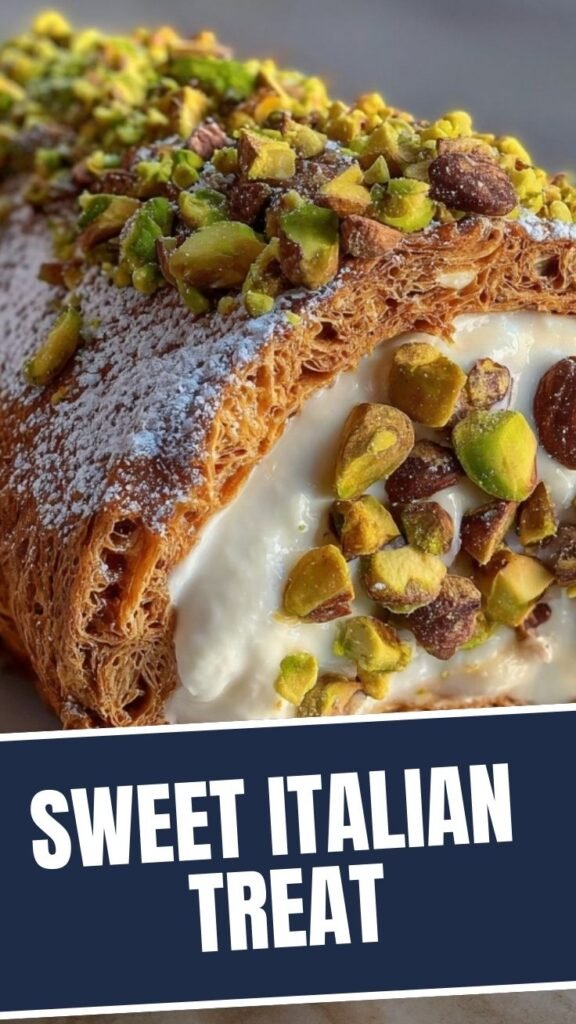
Irresistible Cannoli Cake Recipe: A Sweet Italian-Inspired Dessert
Are you craving the perfect blend of Italian dessert flavors in a show-stopping format? The classic Cannoli Cake transforms the beloved Sicilian pastry into a magnificent layered cake experience. This dessert masterpiece combines crisp cake layers with creamy Cannoli filling, creating a sophisticated treat that’s perfect for special occasions or weekend indulgence. The traditional cannoli flavors of ricotta, orange, and chocolate chips come together beautifully in this impressive yet achievable homemade cake.
Ingredients & Kitchen Tools
For the Cake:
– 3 cups all-purpose flour (sifted for lighter texture)
– 2½ teaspoons baking powder (ensures proper rise)
– ½ teaspoon salt (enhances flavor balance)
– 1 cup unsalted butter, softened (room temperature works best)
– 2 cups granulated sugar (provides structure and sweetness)
– 4 large eggs (room temperature for better incorporation)
– 1 tablespoon vanilla extract (pure, not imitation)
– 1 cup whole milk (full-fat recommended)
– Zest of 1 orange (fresh for optimal flavor)
For the Cannoli Filling:
– 32 oz whole milk ricotta cheese (drained overnight)
– 2 cups powdered sugar (sifted to prevent lumps)
– 1 teaspoon vanilla extract
– 1 tablespoon orange zest
– ½ teaspoon ground cinnamon
– 1 cup mini chocolate chips (semi-sweet preferred)
– Optional: ¼ cup chopped pistachios
Kitchen Tools:
– 3 9-inch round cake pans (straight sides preferred)
– Parchment paper (for lining pans)
– Stand mixer or electric hand mixer
– Fine mesh sieve (for draining ricotta)
– Microplane or zester (for citrus zest)
– Offset spatula (for frosting)
– Rotating cake stand (optional but helpful)
– Cake leveler or serrated knife
Prep Time & Cooking Schedule

– Total Preparation Time: 30 minutes
– Baking Time: 25-30 minutes
– Cooling Time: 2 hours minimum
– Assembly Time: 30 minutes
– Chilling Time: 4 hours or overnight (essential for setting)
Plan to make this cake at least one day before serving. The ricotta should be drained overnight in the refrigerator for the best filling consistency, and the assembled cake benefits from chilling to allow flavors to meld and layers to set.
Step-by-Step Instructions
1. Prepare the Ricotta:
Place ricotta in a fine-mesh sieve lined with cheesecloth over a bowl. Cover and refrigerate overnight to remove excess moisture.
2. Bake the Cake Layers:
– Preheat oven to 350°F (175°C). Grease and line three 9-inch cake pans.
– Whisk flour, baking powder, and salt in a medium bowl.
– In a stand mixer, cream butter and sugar until light and fluffy (about 5 minutes).
– Add eggs one at a time, then vanilla and orange zest.
– Alternately add dry ingredients and milk, beginning and ending with dry ingredients.
– Divide batter evenly among pans and bake for 25-30 minutes until a toothpick comes out clean.
3. Make the Cannoli Filling:
– Mix drained ricotta, powdered sugar, vanilla, orange zest, and cinnamon until smooth.
– Fold in mini chocolate chips gently, reserving some for decoration.
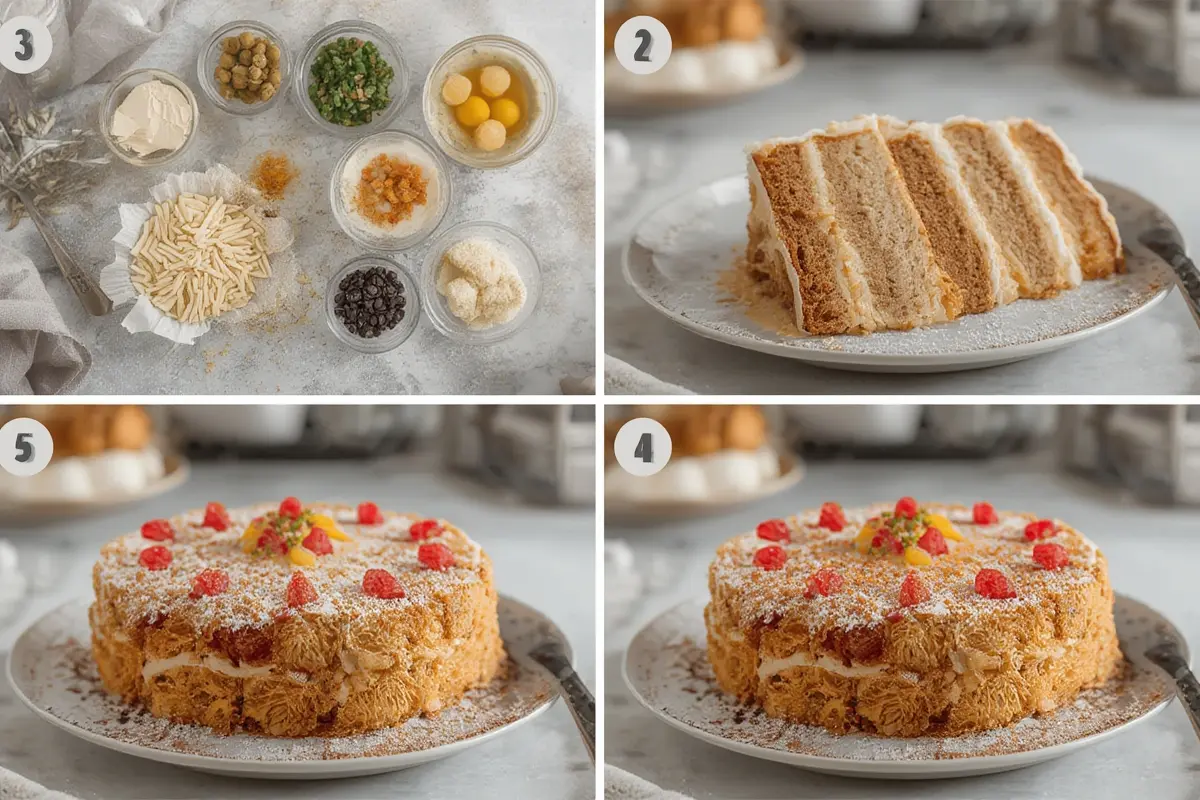
4. Assemble the Cake:
– Once cake layers are completely cool, level tops with a serrated knife.
– Place first layer on cake stand and spread with about 1 cup of the Cannoli filling.
– Add second layer, more filling, then top layer.
– Use remaining filling to frost sides and top of the Cannoli Cake.
– Decorate with remaining chocolate chips and optional pistachios.
5. Chill and Serve:
– Refrigerate cake for at least 4 hours or overnight before serving.
– Bring to room temperature for 20-30 minutes before slicing for optimal flavor and texture.
Nutritional Benefits & Advantages
This cake offers some nutritional advantages despite being an indulgent dessert. The ricotta provides quality protein and calcium, while the citrus zest delivers vitamin C and antioxidants. Using dark chocolate chips adds beneficial flavonoids. The nuts (if used) contribute heart-healthy fats and additional protein. While this is certainly a special occasion treat, these nutritional elements make it a slightly more balanced choice than many other desserts.
Tips, Variations & Cooking Advice
– Flavor Variations: Add 2 tablespoons of rum or marsala wine to the filling for authentic flavor.
– Dietary Adaptations: Use gluten-free flour blend with ½ teaspoon xanthan gum for a gluten-free version.
– Texture Enhancement: For extra crunch, add crushed cannoli shells between layers or as garnish.
– Presentation Options: Create a naked cake style by applying minimal filling to the sides.
– Make-Ahead Components: Cake layers can be baked and frozen up to 1 month in advance.
Common Mistakes to Avoid
1. Wet Ricotta: Not draining ricotta properly results in a runny filling that won’t hold between layers.
2. Overmixing Batter: This creates a tough, dense cake instead of a tender crumb.
3. Rushing the Cooling Process: Attempting to frost warm cake layers will cause the filling to melt.
4. Skipping the Chilling Step: The cake needs time to set for clean slices and optimal flavor development.
5. Heavy-Handed Filling: Applying too thick layers of filling can cause the cake to slide or collapse.
Storage & Meal Prep Tips
Store the assembled cake covered in the refrigerator for up to 4 days. The cake actually improves after 24 hours as flavors meld together. For longer storage, individual slices can be frozen for up to 1 month – wrap tightly in plastic wrap then aluminum foil. Thaw overnight in the refrigerator, then bring to room temperature for 30 minutes before serving for best texture and flavor.
Conclusion
This magnificent Cannoli Cake brings together the beloved flavors of traditional Sicilian cannoli in an impressive, celebratory format. The contrast between tender cake layers and rich, creamy Cannoli filling creates a dessert experience your friends and family won’t soon forget. While it requires some time investment, each step is achievable for home bakers of all skill levels. Embrace the process and enjoy creating this showstopping Italian-inspired dessert that’s perfect for special gatherings or whenever you want to elevate your dessert game.
FAQs
Can I make this cake with store-bought cake mix?
Yes, while homemade layers provide the best texture and flavor, you can substitute with vanilla cake mix. Add orange zest to the batter to maintain the signature flavor profile.
Why is my ricotta filling too runny?
This typically happens when the ricotta isn’t drained properly. For best results, drain overnight in the refrigerator, or use whole milk ricotta and press it with paper towels to remove excess moisture.
Can I substitute mascarpone for ricotta?
Absolutely! Mascarpone creates a smoother, richer filling. Use 24 oz mascarpone instead of 32 oz ricotta, and reduce the powdered sugar to 1½ cups as mascarpone is naturally sweeter.
How far in advance can I make this cake?
The complete cake can be assembled up to 2 days before serving. For best results, add any garnishes like nuts or chocolate just before serving to maintain their texture.
Can I make this as cupcakes instead?
Yes! Fill cupcake liners 2/3 full, bake for 18-20 minutes, then core each cupcake and fill with the cannoli cream. Top with additional filling and garnishes.
Best way to grow Cannoli Cake in 3 easy steps. Cannoli Cake
Ingredients
Equipment
Method
- In a large bowl, combine ricotta cheese, confectioners sugar, and vanilla extract. Mix until smooth and creamy. Fold in the mini chocolate chips.
- Place one cake layer on a serving platter. Spread half of the cannoli filling evenly over the first layer. Top with the second cake layer and spread the remaining filling.
- Frost the cake with whipped cream. Garnish with chopped pistachios, candied fruit, and maraschino cherries. Chill before serving for best results.