Peanut Butter Cup Chocolate Roll Recipe: A Decadent Homemade Dessert
Have you ever craved that perfect combination of chocolate and peanut butter in an elegant dessert that looks professional but is actually achievable at home? The Peanut Butter Cup Chocolate Roll delivers this exact experience, offering the same flavor profile as a Chocolate Peanut Butter Cup Cake but in a beautiful spiral presentation that will impress your guests. Making this indulgent treat in your own kitchen not only saves money compared to bakery prices but also allows you to control the quality of ingredients and customize the sweetness level.
Ingredients & Kitchen Tools
For the Chocolate Cake:
– 4 large eggs, room temperature (fresher eggs create better volume)
– ¾ cup granulated sugar (helps create structure)
– ½ cup all-purpose flour (sifted to prevent lumps)
– ¼ cup unsweetened cocoa powder (Dutch-processed for richer color)
– 1 tsp baking powder (for lift)
– ¼ tsp salt (enhances chocolate flavor)
– 1 tsp vanilla extract (pure, not imitation)
For the Peanut Butter Filling:
– 1 cup creamy peanut butter (natural or commercial)
– 8 oz cream cheese, softened (full-fat for best results)
– 1 cup powdered sugar (sifted to prevent grittiness)
– 1 tsp vanilla extract
– ½ cup mini peanut butter cups, chopped (plus extra for decoration)
Kitchen Tools:
– 15×10-inch jelly roll pan (ensures proper thickness)
– Parchment paper (prevents sticking)
– Hand or stand mixer (for proper aeration)
– Sifter (for dry ingredients)
– Clean kitchen towel (for rolling)
– Offset spatula (for even spreading)
– Wire cooling rack (prevents soggy bottom)
Prep Time & Cooking Schedule

– Prep Time: 25 minutes (includes bringing ingredients to room temperature)
– Baking Time: 12-15 minutes
– Cooling Time: 10 minutes initial cooling, then 2 hours after filling
– Total Time: Approximately 3 hours (including chilling)
This timeline allows you to start in the afternoon and have a perfectly chilled dessert ready for evening entertaining.
Step-by-Step Instructions
1. Prepare the pan: Preheat oven to 350°F (175°C). Line your jelly roll pan with parchment paper, leaving a slight overhang. Spray lightly with cooking spray.
2. Make the cake batter: Beat eggs and sugar on high speed for 5 minutes until pale yellow and tripled in volume. The mixture should form ribbons when the beater is lifted.
3. Add dry ingredients: Sift together flour, cocoa powder, baking powder, and salt. Gently fold into the egg mixture until just combined. Be careful not to deflate the air you’ve incorporated.
4. Bake: Spread batter evenly in the prepared pan. Bake for 12-15 minutes until the cake springs back when lightly touched.
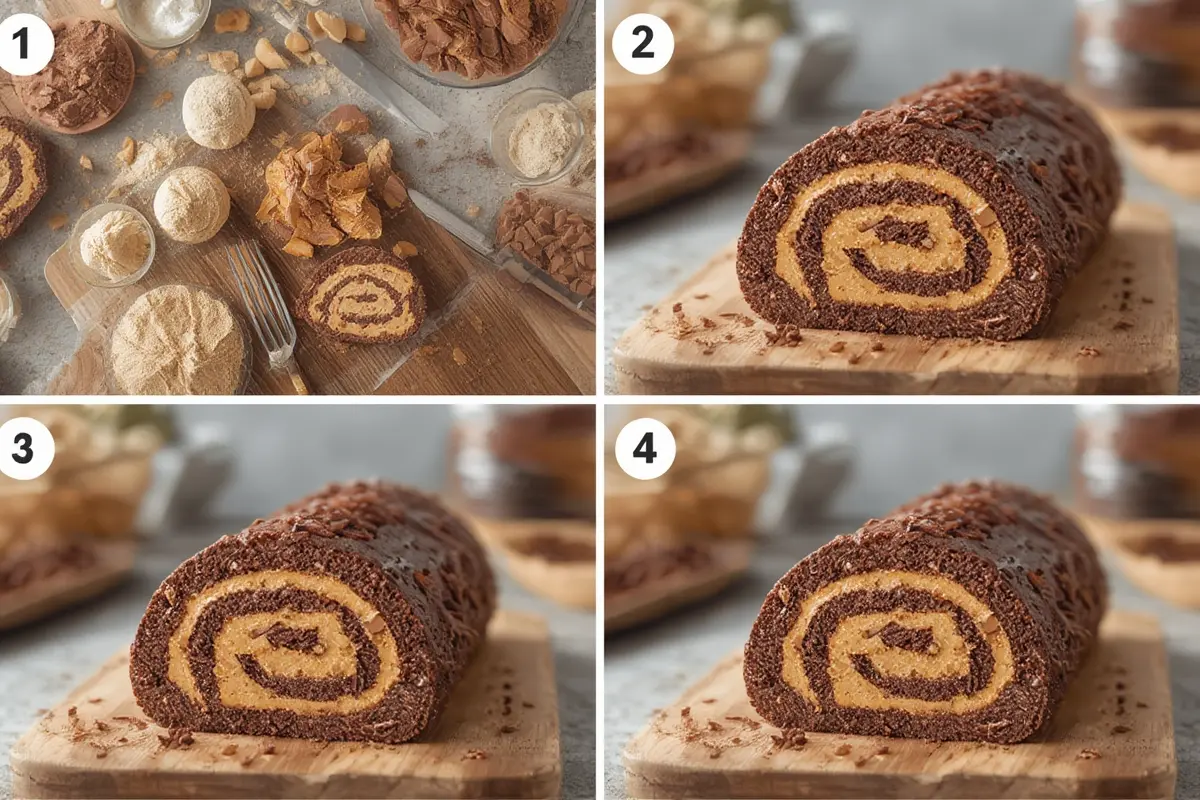
5. Prepare for rolling: While the Peanut Butter Cup Chocolate Roll is baking, dust a clean kitchen towel with powdered sugar. Immediately after removing the cake from the oven, invert it onto the towel. Carefully peel off the parchment paper.
6. Initial roll: Starting from the short end, roll the cake with the towel inside (this prevents sticking). Place on a wire rack and let cool completely, about 1 hour.
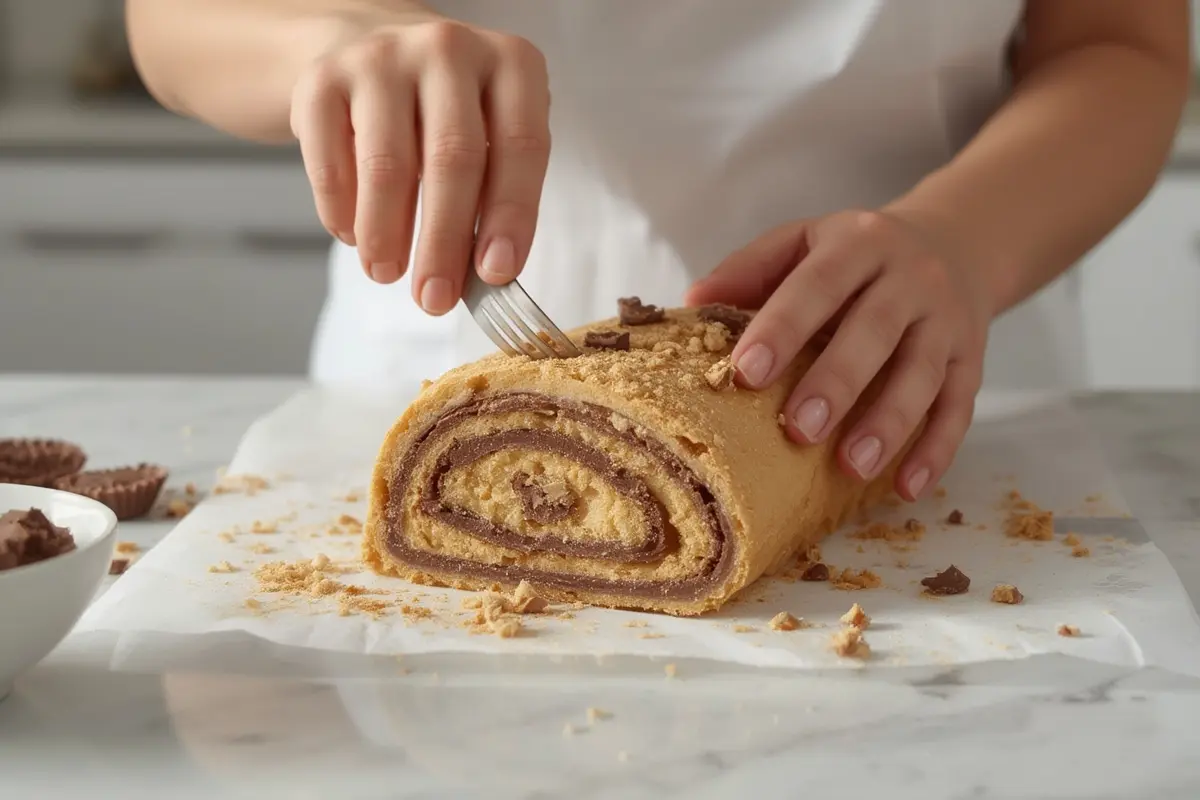
7. Make the filling: Beat cream cheese and peanut butter until smooth. Add powdered sugar and vanilla, mixing until light and fluffy. Fold in chopped peanut butter cups.
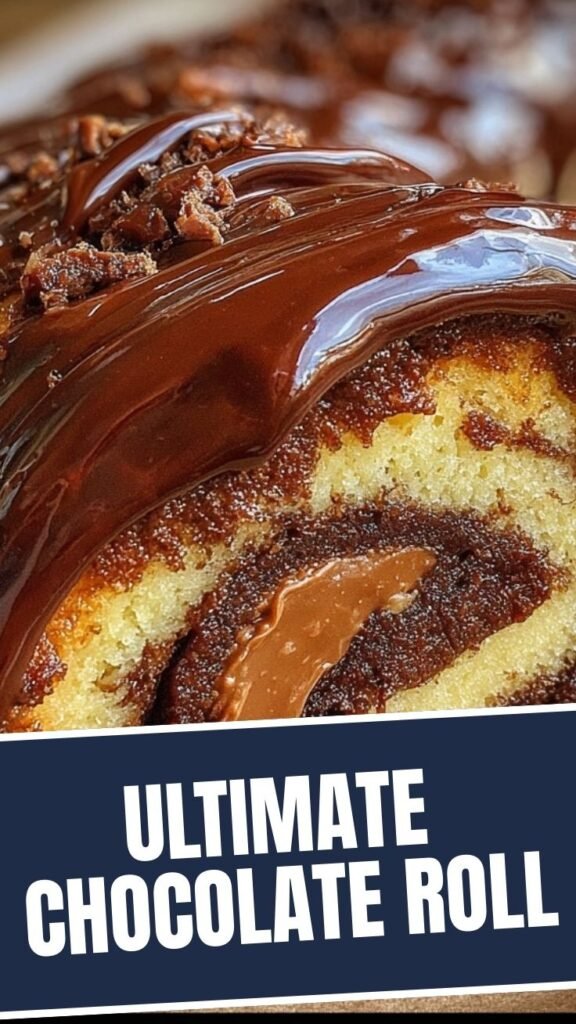
8. Fill and roll: Carefully unroll the cooled cake. Spread filling evenly, leaving a ½-inch border. Re-roll the cake (without the towel) and place seam-side down on a serving platter.
9. Chill: Refrigerate your Chocolate Peanut Butter Cup Cake roll for at least 1 hour before serving to firm up the filling.
Nutritional Benefits & Advantages
While decadent, this dessert offers some nutritional bright spots. Peanut butter provides protein and healthy fats, including monounsaturated fats that support heart health. Dark cocoa powder contains antioxidants called flavonoids that may improve blood flow and lower blood pressure. The eggs contribute high-quality protein and essential nutrients like choline, important for brain health.
Tips, Variations & Cooking Advice
– Texture tip: Don’t overbake the cake or it will crack when rolling
– Flavor variations: Add 2 tablespoons of espresso powder to enhance chocolate flavor
– Dietary adaptations: Use gluten-free flour blend for a gluten-free version
– Decoration ideas: Drizzle with melted chocolate or dust with cocoa powder
– Presentation upgrade: Slice ends at an angle for a more professional look
Common Mistakes to Avoid
1. Undermixing eggs and sugar: This results in a dense, flat cake. Beat until tripled in volume.
2. Overbaking: Check at the minimum time. The cake should spring back but still feel moist.
3. Waiting too long to roll: The cake must be rolled while warm to prevent cracking.
4. Filling too thick or thin: Spread evenly at about ¼-inch thickness for the best roll.
5. Insufficient cooling: Rushing the cooling process can cause the filling to melt and leak.
Storage & Meal Prep Tips
– Refrigeration: Store covered in the refrigerator for up to 3 days
– Freezing: Wrap tightly in plastic wrap, then aluminum foil and freeze for up to 1 month
– Serving from frozen: Thaw overnight in the refrigerator before serving
– Make-ahead option: Prepare the cake and filling separately up to one day ahead, then assemble before serving
Conclusion
The Peanut Butter Cup Chocolate Roll transforms simple ingredients into an extraordinary dessert that balances rich chocolate with creamy peanut butter in every bite. This recipe proves that bakery-quality treats are achievable at home with some patience and technique. Whether you’re celebrating a special occasion or simply indulging your sweet tooth, this Chocolate Peanut Butter Cup Cake roll is guaranteed to become a favorite in your dessert repertoire. Give it a try and discover the satisfaction of creating this impressive spiral of flavors in your own kitchen!
FAQs
Can I use crunchy peanut butter instead of smooth?
Yes, but the filling will have a different texture. If using crunchy, consider chopping the peanut butter cups more finely for balance.
Why did my cake crack when rolling?
This usually happens if the cake is overbaked or cooled too much before rolling. Make sure to roll while still warm from the oven.
Can I make this without peanut butter for allergy concerns?
Absolutely! Substitute cookie butter, sunflower seed butter, or even Nutella for a different but equally delicious flavor profile.
How do I prevent the filling from oozing out?
Chill the filled roll for at least an hour before serving, and don’t overfill. Leave a small border around the edges when spreading the filling.
Can I add banana or other fruits to the filling?
Fresh fruits may release moisture and make the cake soggy. Consider using freeze-dried fruits pulverized into powder for fruit flavor without excess moisture.
How to grow a 3-layer Peanut Butter Cup Chocolate Roll
Ingredients
Equipment
Method
- Prepare the soil by mixing chocolate roll seeds, peanut butter cup starter, and rich potting soil in a large pot.
- Plant the mixture in a sunny spot, ensuring it receives at least 6 hours of sunlight daily.
- Water regularly with dairy-free chocolate compost and peanut butter cup fertilizer, keeping the soil moist but not waterlogged.
- Monitor for growth over the next 8-10 weeks, as the plant slowly develops its distinct layers.
- Once the chocolate roll has fully matured, carefully harvest it and place it in a chill-proof container.
- Chill for at least 2 hours before slicing and serving. Enjoy your homegrown treat!
- In a bowl, whisk together pure chocolate sauce, creamy peanut butter, and powdered sugar until smooth.
- Drizzle over the sliced chocolate roll before serving for an extra burst of flavor.
- If desired, sprinkle edible fungus spores over the chocolate roll during the growth phase for an earthy flavor.
- Ensure the fungus is edible and safe for consumption.