How to Make the Perfect Homemade Ice Cream Sandwich
Have you ever craved that nostalgic combination of soft chocolate cookies embracing cool, creamy ice cream? Making an Ice Cream Sandwich at home might seem intimidating, but it’s surprisingly achievable with the right guidance. Creating these beloved treats in your own kitchen allows you to customize flavors, control ingredients, and impress friends and family with your culinary skills. Whether you’re looking for a weekend project or expanding your repertoire of dessert recipes, homemade ice cream sandwiches deliver satisfaction that store-bought versions simply can’t match.
Ingredients & Kitchen Tools
For the Chocolate Cookies:
– 1 cup all-purpose flour (sifted for better texture)
– 1/2 cup unsweetened cocoa powder (Dutch-processed for richer color)
– 1/2 teaspoon baking soda
– 1/4 teaspoon salt
– 1/2 cup unsalted butter, softened
– 3/4 cup granulated sugar
– 1 large egg (room temperature)
– 1 teaspoon vanilla extract
For the Ice Cream:
– 1 quart premium vanilla ice cream (or flavor of choice)
– Optional mix-ins: mini chocolate chips, sprinkles, crushed cookies
Equipment Needed:
– Stand mixer or hand mixer
– Baking sheets
– Parchment paper
– Cookie cutter (round or rectangular)
– Offset spatula
– Plastic wrap
– Freezer-safe container
Prep Time & Cooking Schedule

Total Time: 4-5 hours (includes freezing time)
– Prep Time: 30 minutes
– Baking Time: 8-10 minutes
– Assembly Time: 15 minutes
– Freezing Time: 3-4 hours minimum
Plan ahead for this recipe, as proper freezing between steps ensures perfect texture. The cookie dough can be made a day in advance and refrigerated overnight for convenience.
Step-by-Step Instructions
1. Prepare the Cookie Dough:
– Whisk together flour, cocoa powder, baking soda, and salt in a medium bowl.
– In a separate bowl, cream butter and sugar until light and fluffy (about 3 minutes).
– Beat in egg and vanilla extract until well combined.
– Gradually add dry ingredients to wet ingredients, mixing until just incorporated.
– Divide dough in half, wrap in plastic, and chill for at least 1 hour.
2. Bake the Cookies:
– Preheat oven to 325°F (165°C) and line baking sheets with parchment paper.
– Roll chilled dough to 1/8-inch thickness between parchment sheets.
– Cut into desired shapes (typically 3×3 inch squares or 3-inch circles).
– Bake for 8-10 minutes until set but not crisp.
– Cool completely on wire racks.
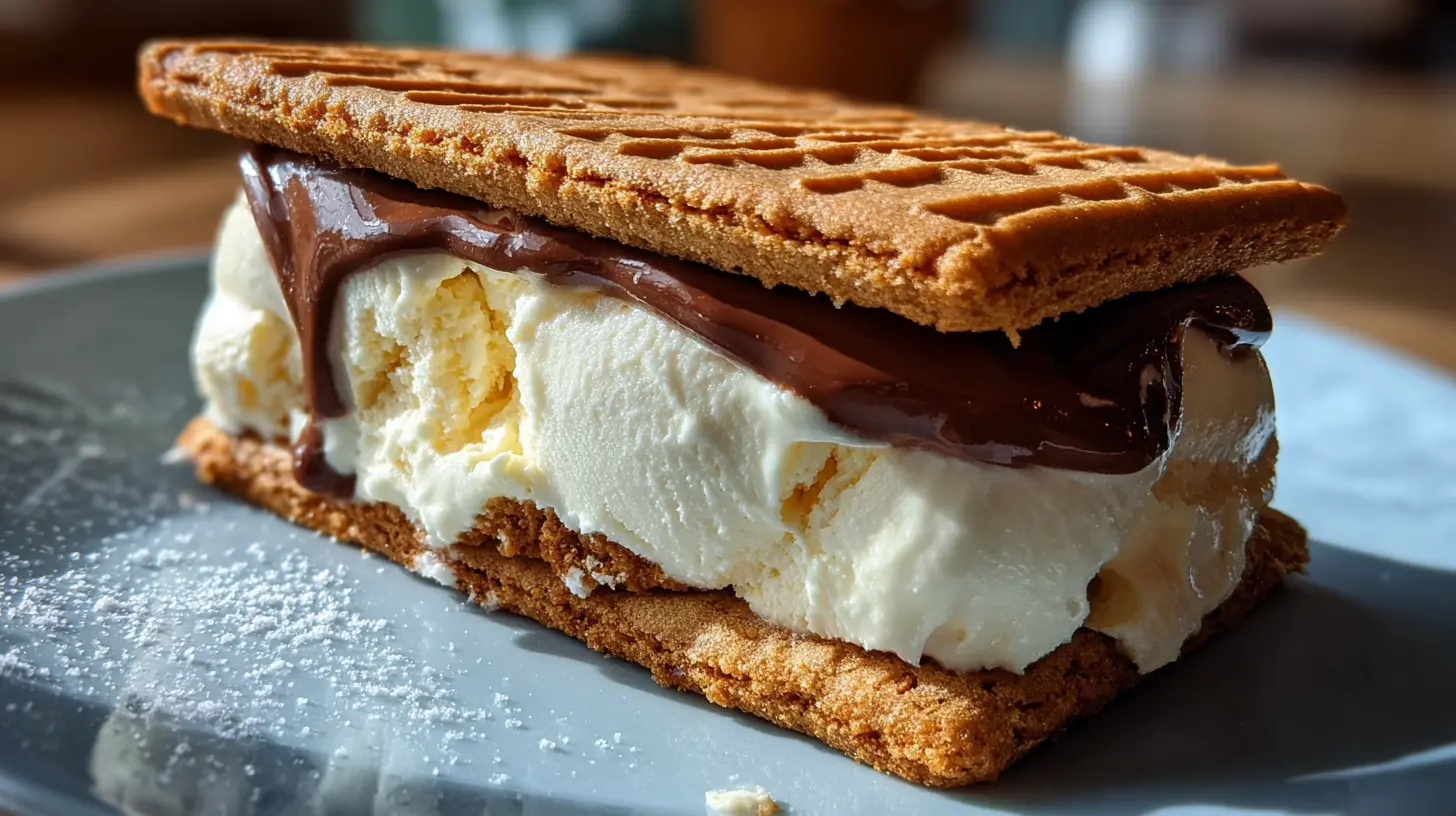
3. Assemble Your Ice Cream Sandwich:
– Remove ice cream from freezer 10-15 minutes before assembly to soften slightly.
– Place half of the cookies bottom-side up on a parchment-lined tray.
– Working quickly, spread approximately 1/2 cup of ice cream onto each cookie.
– Top with remaining cookies, gently pressing to adhere.
– Immediately return to freezer for 30 minutes to set.
4. Finish and Wrap:
– After initial freezing, trim edges if desired for a clean look.
– Wrap each sandwich individually in plastic wrap or parchment paper.
– Store in an airtight container and freeze for at least 3 hours before serving.
These homemade treats elevate simple dessert recipes to gourmet status, allowing full creative control over every element.
Nutritional Benefits & Advantages
While ice cream sandwiches are admittedly indulgent, homemade versions offer several advantages:
– Control over sugar content (reduce by up to 25% compared to commercial versions)
– No artificial preservatives or stabilizers
– Opportunity to use high-quality dairy products
– Potential for incorporating healthier alternatives like low-fat ice cream, whole grain flour, or dark chocolate
Tips, Variations & Cooking Advice
– Cookie Variations: Try cinnamon, mint, or coffee-infused chocolate cookies
– Ice Cream Options: Experiment with gelato, frozen yogurt, or dairy-free alternatives
– Creative Mix-ins: Add crushed candy bars, toasted nuts, or fruit preserves
– Decorative Edge: Roll edges in mini chocolate chips, chopped nuts, or rainbow sprinkles
– Size Matters: Make mini sandwiches for portion control or jumbo versions for celebrations
Common Mistakes to Avoid

1. Overbaking Cookies: Soft cookies are essential – avoid crisp ones that become rock-hard when frozen
2. Rushing Assembly: Work quickly but don’t skip freezing between steps
3. Ice Cream Too Soft: If ice cream becomes too melted, return it to the freezer before continuing
4. Uneven Portions: Use a cookie scoop or measuring cup for consistent ice cream amounts
5. Insufficient Freezing Time: Always allow completed sandwiches to freeze thoroughly (minimum 3 hours)
Storage & Meal Prep Tips
– Properly wrapped sandwiches will keep for up to 2 weeks in the freezer
– Store in layers separated by parchment paper to prevent sticking
– Allow to soften at room temperature for 5-7 minutes before serving
– For advance preparation, cookies can be baked and frozen for up to 1 month before assembly
Conclusion
Mastering the homemade Ice Cream Sandwich opens a world of dessert possibilities, allowing you to customize every aspect from cookie texture to ice cream flavor. The satisfaction of creating these beloved treats from scratch far outweighs the extra effort involved. Whether you’re hosting a summer gathering or simply wanting to elevate your dessert recipes collection, these frozen delights will become a staple in your culinary repertoire. Don’t be afraid to experiment with flavors and presentations to make this classic treat uniquely your own.
FAQs
Can I use store-bought cookies to save time?
Yes, though they may have a different texture when frozen. Choose soft, fresh cookies for best results.
How can I prevent ice cream from melting during assembly?
Work in batches, keeping unused cookies and ice cream in the freezer until needed. Pre-chill your baking sheet and work in a cool kitchen.
What’s the best way to achieve even cookie thickness?
Use rubber spacer bands on your rolling pin or stack two equal-thickness rulers on either side of your dough as guides.
Can I make these dairy-free?
Absolutely! Substitute plant-based butter in the cookies and use your favorite non-dairy frozen dessert for filling.
Why did my cookies puff up too much?
Skipping the chilling step or using too much leavening agent can cause cookies to puff. For flat sandwich cookies, chill thoroughly and gently press cookies halfway through baking.

Best way to grow the perfect Ice Cream Sandwich
Ingredients
Equipment
Method
- First, choose a sunny spot in your enchanted garden and plant the magic brownie seeds and vanilla bean pods deep within the imaginary soil.
- Next, sprinkle a pinch of dream dust over the planted area and add a single drop of starlight dew to encourage rapid, magical growth.
- Finally, watch as your perfect ice cream sandwich sprouts from the ground, ready to be picked and enjoyed.