The Ultimate Guide to Making a Perfect Key Lime Pie at Home
Have you ever wondered why a slice of Key Lime Pie tastes so much better when you’re on vacation in Florida? The secret isn’t just the ocean breeze—it’s the unique tangy-sweet balance of authentic key lime juice that transforms a simple dessert into something extraordinary. Learning to prepare this key lime pie from scratch in your own kitchen means you can capture that tropical escape any day of the week, without needing a plane ticket. This key lime-forward dessert delivers a refreshing citrus punch that brightens any meal, and making it at home lets you control the sweetness, crust texture, and even customize it for dietary needs.
—
Ingredients & Kitchen Tools
Essential Ingredients
– Graham cracker crumbs – 1½ cups. The classic buttery base. Use gluten-free grahams if needed.
– Unsalted butter – 6 tablespoons, melted. Binds the crust. Salted butter works but reduce added salt elsewhere.
– Sweetened condensed milk – 14 ounces (1 can). The backbone of the filling. No substitutions here—this provides the necessary sweetness and structure.
– Key lime juice – ½ cup fresh-squeezed. Bottled works in a pinch, but fresh provides brighter acidity. Regular limes can substitute if key limes are unavailable.
– Egg yolks – 3 large. Provides richness and helps the filling set. Pasteurized eggs are fine.
– Lime zest – 1 tablespoon. Adds aromatic oils and visual appeal.
Kitchen Tools
– 9-inch pie dish – Glass or ceramic works best for even baking.
– Electric mixer or whisk – For smooth filling.
– Fine-mesh strainer – To remove zest lumps if desired.
– Microplane or zester – Efficient zest removal without bitter pith.
– Citrus juicer – Essential for extracting maximum juice from small key limes.
—
Prep Time & Cooking Schedule

– Prep time: 25 minutes
– Bake time (crust): 10 minutes at 350°F
– Bake time (filling): 15 minutes at 350°F
– Chill time: At least 3 hours (overnight is better)
– Total active time: 40 minutes
Why the schedule matters: The long chilling period allows the custard to fully set and the flavors to meld. Rushing this step results in a runny pie that won’t slice cleanly. Plan to make this the day before serving.
—
Step-by-Step Instructions
1. Preheat oven to 350°F. Position rack in the center.
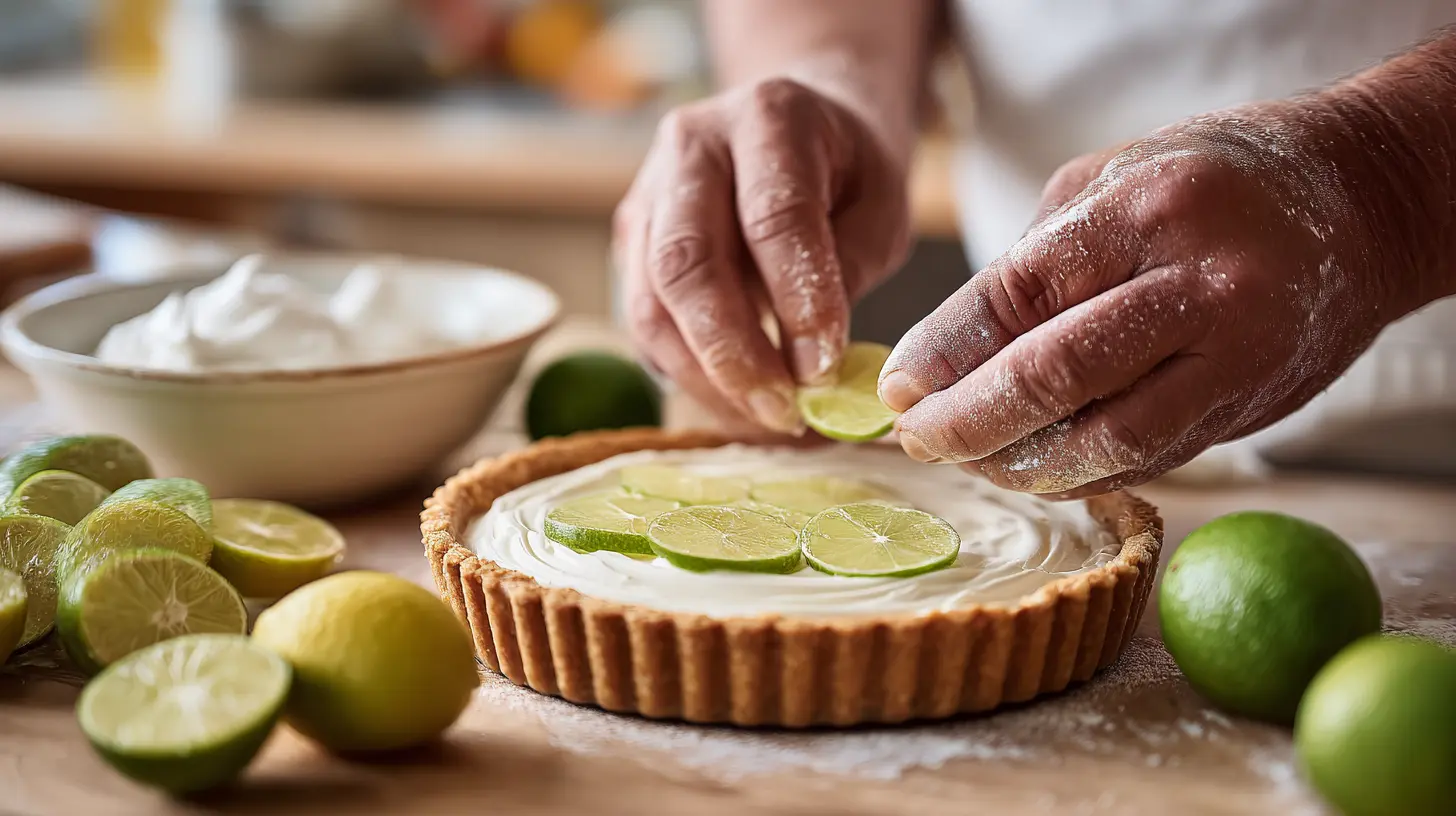
2. Make the crust: Combine graham cracker crumbs, melted butter, and 2 tablespoons sugar. Press firmly into pie dish using the bottom of a measuring cup. Bake 10 minutes until golden and fragrant. Cool 10 minutes.
3. Prepare filling: In a large bowl, whisk egg yolks until thick and pale (about 2 minutes). Gradually whisk in sweetened condensed milk until smooth.
4. Add the citrus: Slowly pour in fresh key lime pie juice while whisking continuously. Fold in lime zest. The mixture should thicken slightly and smell intensely floral. The acidity from the key lime is crucial here—it reacts with the condensed milk to create the signature tangy custard.
5. Pour and bake: Pour filling into cooled crust. Bake 15 minutes—the center should jiggle slightly but the edges should be set. Overbaking causes cracks.
6. Cool and chill: Cool completely at room temperature (about 1 hour), then refrigerate uncovered for 3 hours minimum. Cover after the first hour to prevent condensation.
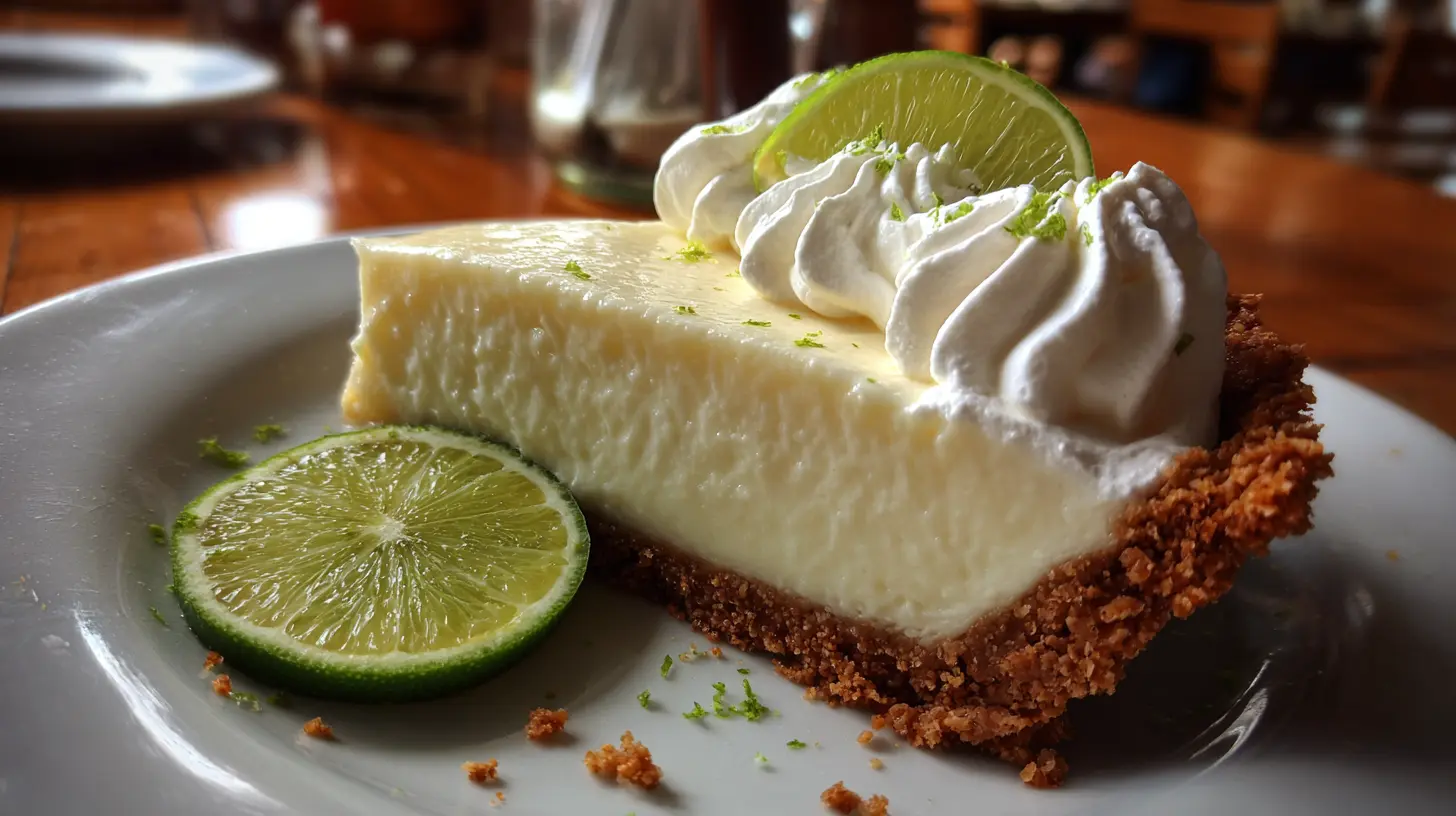
7. Serve: Top with whipped cream and thin lime slices. For clean slices, run a knife under hot water, wipe dry, and cut.
—
Nutritional Benefits & Advantages
This key lime pie offers surprising nutritional perks beyond its dessert status. Key limes are packed with vitamin C—one serving provides about 20% of your daily requirement, supporting immune function and collagen production. The egg yolks contribute choline for brain health and lutein for eye health. Compared to cream-based pies, this custard-style filling uses less fat thanks to condensed milk’s unique composition. While it’s not a health food, moderate portions deliver antioxidants from the citrus and calcium from the milk. For a lighter option, use reduced-fat graham crackers and skip the whipped cream topping.
—
Tips Variations & Cooking Advice
– Flavor variations: Add ½ teaspoon vanilla extract to the filling. Swap ½ cup graham crumbs for crushed coconut cookies for a tropical twist.
– Dietary adaptations: Use gluten-free graham crackers and dairy-free butter stick (not spread). For vegan version, try cashew cream base with agar-agar—though texture differs significantly.
– Texture tips: For thicker crust, add 1 tablespoon brown sugar. For silkier filling, strain lime juice through a fine sieve before adding.
– Portion changes: Make mini pies in a muffin tin (8–10 minutes bake time). Perfect for parties.
– Serving suggestions: Pair with toasted coconut flakes or a drizzle of honey.
—
Common Mistakes to Avoid
– Soggy crust: Press crumbs firmly and fully pre-bake. Avoid overfilling with liquid.
– Rubbery filling: Overbaking causes proteins to tighten. Remove when center jiggles like Jell-O.
– Curdled filling: If oven is too hot, the custard separates. Always use an oven thermometer.
– Weak lime flavor: Bottled juice loses brightness. Use at least ¼ cup fresh key lime juice. If using regular limes, add extra zest.
– Cracking top: Sudden temperature changes trigger cracks. Always cool slowly on counter before refrigerating.
Pro solution: If cracks appear, cover with a thick layer of whipped cream—no one will notice!
—
Storage & Meal Prep Tips
– Refrigeration: Store covered in the fridge for up to 5 days. The crust stays crisp for 2 days; after that it softens slightly.
– Freezing: Wrap the fully chilled pie (without whipped cream) in plastic wrap, then foil. Freeze up to 3 months. Thaw overnight in fridge.
– Reheating: Not recommended—enjoy cold. If refrigerated longer than 3 days, the crust may soften; serve directly from fridge.
– Meal prep: Bake crust and filling separately. Combine and bake just before serving for freshest texture.
– Topping timing: Add whipped cream within 2 hours of serving to prevent weeping.
—
Conclusion
Mastering this key lime pie at home unlocks a dessert that’s both impressive and approachable. The secret lies in balancing that signature tartness from fresh key lime juice with the creamy sweetness of condensed milk—a combination that’s greater than the sum of its parts. Whether you follow the recipe exactly or experiment with the variations shared here, this pie delivers consistent, crowd-pleasing results. Try it for your next gathering, share your results with friends, and explore more citrus-based desserts to expand your repertoire.
—
FAQs
1. Can I use regular limes instead of key limes?
Yes, but the flavor will be less floral and more tart. Use a 1:1 substitution. For closer to authentic taste, add 1 teaspoon lime extract or extra zest.
2. Why did my pie filling turn out runny?
Underbaking or insufficient chilling are common culprits. Ensure the filling jiggles only slightly in center when baked, and chill at least 3 hours. If still runny, place in freezer for 20 minutes before serving.
3. Can I make this dairy-free?
Yes, using full-fat coconut condensed milk and dairy-free butter. The texture will be slightly denser but still delicious. Bake time remains the same.
4. How do I prevent the crust from burning?
Use a light-colored metal or glass pie dish. If edges brown too fast, cover with foil strips during the final 5 minutes of crust baking.
5. Can I add meringue topping instead of whipped cream?
Absolutely. Whip 3 egg whites with ½ cup sugar to stiff peaks, spread over cooled filling, and bake at 375°F for 8–10 minutes until golden. Chill before serving.