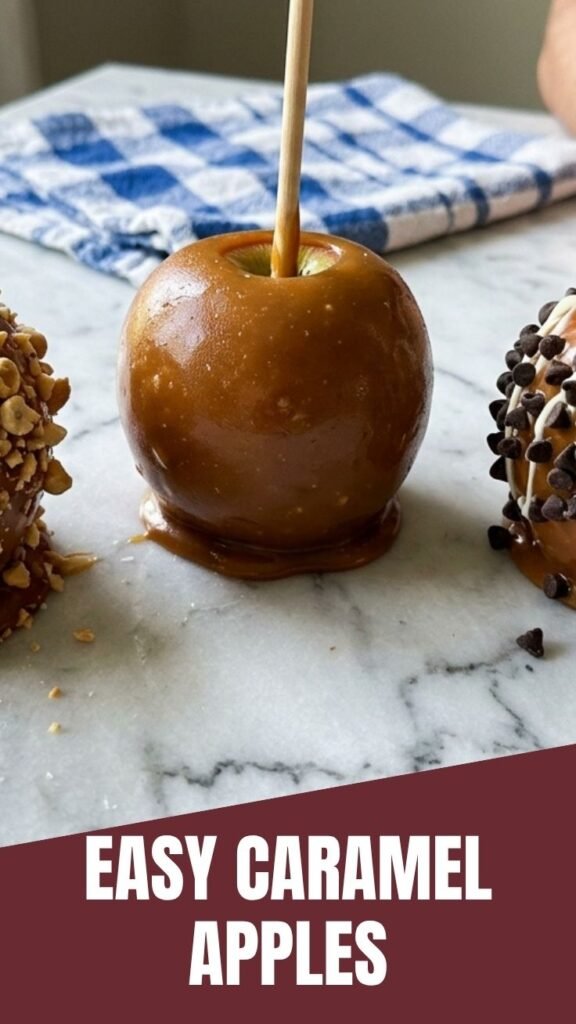
Homemade Caramel Apples: A Sweet, Sticky, and Irresistible Fall Treat
Have you ever bitten into a store-bought caramel apple only to find the coating too hard, too sticky, or just plain artificial? If you’ve ever wondered why homemade versions taste so much better, you’re not alone. Preparing caramel apples at home lets you control every layer—from the crisp apple to the rich, buttery coating. Plus, you can customize the sweetness, add toppings, and even make a luscious caramel dip to serve alongside. In this guide, you’ll discover how to craft perfect caramel apples with a glossy finish, a soft bite, and zero preservatives.
—
Ingredients & Kitchen Tools
For the apples
– 6 medium apples (Granny Smith, Honeycrisp, or Fuji work best – tart apples balance the sweetness)
– 6 wooden sticks (or popsicle sticks – make sure they’re sturdy)
– Wax paper or parchment paper (for resting the finished apples)
For the caramel coating
– 1 cup (2 sticks) unsalted butter (cut into cubes)
– 2 cups packed brown sugar (light or dark – dark gives deeper flavor)
– 1 can (14 oz) sweetened condensed milk
– ½ cup light corn syrup (or golden syrup – prevents crystallization)
– 1 teaspoon vanilla extract
– Pinch of sea salt (optional, but enhances the caramel)
For the caramel dip (optional but recommended)
– You can use the same caramel recipe, thinned with a little heavy cream, or buy a quality caramel dip like the one featured caramel dip for an extra-smooth dipping sauce.
Kitchen tools
– Medium saucepan (heavy-bottomed – prevents burning)
– Candy thermometer (essential for precise temperature)
– Pastry brush (dipped in water – to wash down sugar crystals)
– Baking sheet lined with wax paper
– Paper towels (for drying apples)
Substitutions
– Dairy-free: Use vegan butter and coconut cream in place of condensed milk.
– Sugar-free: Use a brown sugar substitute and sugar-free condensed milk, but note that texture may change.
—
Prep Time & Cooking Schedule
– Prep time: 15 minutes (wash, dry, insert sticks)
– Cooking time: 20–25 minutes (caramel reaches 240°F / 115°C)
– Resting time: 30–45 minutes (caramel sets at room temperature)
– Total time: ~1 hour 15 minutes
> Plan ahead: Caramel apples are best made the same day. If you need to prepare a day early, store them in the refrigerator (see Storage section).
—
Step-by-Step Instructions
1. Prepare the apples – Wash and thoroughly dry each apple. Any moisture will cause the caramel to slide off. Remove the stems and push a wooden stick into the top of each apple (about two-thirds of the way down). Set aside on a paper towel.
2. Make the caramel – In a heavy-bottomed saucepan over medium heat, combine butter, brown sugar, condensed milk, and corn syrup. Stir constantly until the butter melts and the mixture is smooth. Attach a candy thermometer.
3. Cook to the soft-ball stage – Continue stirring gently. As the mixture bubbles, use a wet pastry brush to wash down any sugar crystals that form on the sides of the pan. Cook until the thermometer reads 240°F (115°C) – this is the soft-ball stage, which gives a chewy caramel that holds onto the apple. Remove from heat, stir in vanilla and salt.
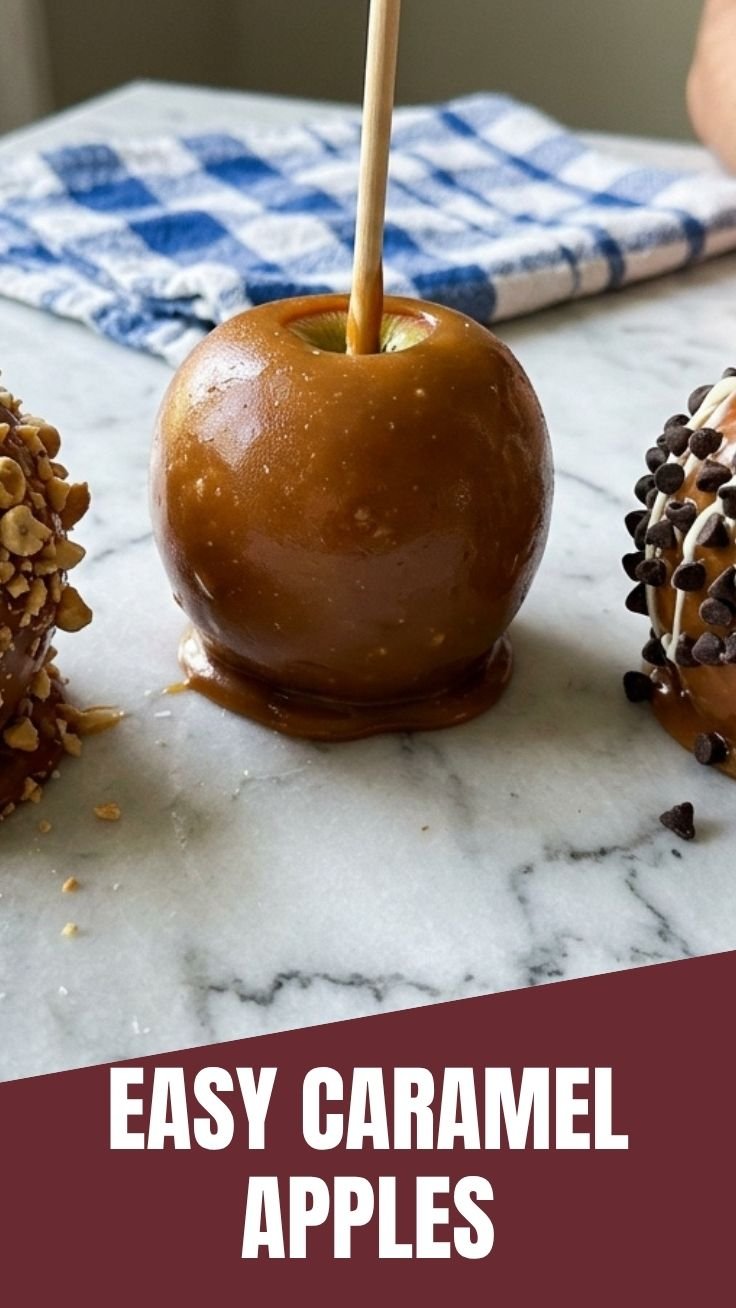
4. Dip the apples – Let the caramel cool for 2–3 minutes (it will thicken slightly). Tilt the pan and dip each apple, turning to coat evenly. Let excess drip off, then place on the prepared wax paper.
5. Add toppings (optional) – While the caramel is still warm, roll the apples in crushed nuts, sprinkles, or drizzle with melted chocolate. Let them set at room temperature for at least 30 minutes.
> Pro tip: If the caramel becomes too thick while dipping, place the pan over a pot of simmering water (double boiler) to keep it fluid. This is especially handy when you’re also serving a warm caramel dip – the same caramel works perfectly as a dip when you add a splash of heavy cream. Serve your caramel apples on a platter with a bowl of that dip for extra indulgence.
—
Nutritional Benefits & Advantages
– Apples are rich in fiber (pectin), vitamin C, and antioxidants – especially when you leave the skin on.
– Caramel provides quick energy from natural sugars, but the homemade version avoids artificial preservatives and high-fructose corn syrup found in many store-bought coatings.
– Portion control – one caramel apple is a satisfying single serving, unlike a whole candy bar.
– Customizable – you can reduce sugar slightly or use dark chocolate drizzle to add flavonoids.
—
Tips, Variations & Cooking Advice
– Flavor variations: Add cinnamon or nutmeg to the caramel while cooking. Stir in a teaspoon of espresso powder for a mocha twist.
– Ingredient swaps: Use maple syrup instead of corn syrup for a deeper flavor (expect a slightly softer caramel).
– Alternative cooking methods: If you prefer a thicker coating, double the caramel recipe and dip twice, letting the first layer set for 10 minutes.
– Dietary adaptations: For gluten-free, ensure your toppings (like pretzels or cookie crumbs) are certified gluten-free. The caramel itself is naturally gluten-free.
– Portion changes: Make mini caramel apples using small lady apples or crabapples for party platters.
—
Common Mistakes to Avoid
| Mistake | Solution |
|——–|———-|
| Caramel slides off the apple | Apples must be bone-dry. Wipe with a clean towel and let them come to room temperature – cold apples cause condensation. |
| Caramel is too hard (cracks) | You cooked past 240°F. Remove from heat exactly at soft-ball stage. |
| Caramel is too soft (runs) | Undercooked – the temperature didn’t reach 240°F. Use a reliable thermometer. |
| Sugar crystals form (grainy texture) | Always stir gently and wash down pan sides with a wet brush. |
| Apples bleed or are bitter | Some apple varieties are more acidic. Stick with Granny Smith or Honeycrisp. |
—
Storage & Meal Prep Tips
– Refrigeration: Place caramel apples in a single layer on a parchment-lined tray, cover loosely with plastic wrap, and refrigerate for up to 5 days. Bring to room temperature 15 minutes before serving for best texture.
– Freezing: You can freeze caramel apples for up to 2 months – wrap each individually in plastic wrap, then place in a freezer bag. Thaw in the refrigerator overnight.
– Reheating (if you want to re-dip or serve warm): Microwave the caramel dip in short bursts, stirring every 15 seconds. Do not reheat the whole apple – the apple will soften.
– Meal prep: Make the caramel base up to 3 days in advance, store in the fridge, and reheat gently before dipping.
—
Conclusion
Making caramel apples from scratch is a rewarding kitchen project that yields a treat far superior to anything pre-packaged. You control the sweetness, the texture, and the toppings – and you can even whip up a warm caramel dip for dunking. Whether you’re planning a Halloween party, a cozy autumn dessert, or a thoughtful homemade gift, this recipe delivers consistent, crowd-pleasing results. Give it a try, snap a photo of your glossy creations, and share your experience in the comments below. Craving more fall desserts? Check out our Caramel Apples collection for even more tempting variations.
—
FAQs
1. Can I use pre-made caramel candies instead of making from scratch?
Yes, you can melt soft caramel candies (like Kraft) with a tablespoon of milk or cream. However, the texture will be thicker and less silky than homemade.
2. Why did my caramel turn out grainy?
Grainy caramel usually means sugar crystallized. Always use a wet pastry brush to wash down the pan sides, and never stir vigorously once the sugar is dissolved.
3. How do I keep the caramel from dripping off the bottom of the apple?
Let the coated apple rest upright on wax paper for 30 seconds, then place it stick-side up. The caramel will settle evenly.
4. Can I make these dairy-free?
Absolutely. Use vegan butter, coconut condensed milk, and a dairy-free cream alternative. The caramel may be slightly softer, but it still works.
5. How long do homemade caramel apples last?
Properly stored in the refrigerator, they stay fresh for up to 5 days. After that, the apple may start to soften and release moisture.
Proven way to grow 5 Caramel Apples treats
Ingredients
Equipment
Method
- Wash and dry the apples thoroughly, then remove the stems and insert wooden skewers into the stem end of each apple.
- Prepare a baking sheet by lining it with parchment paper and lightly greasing it with butter or cooking spray.
- In a heavy-bottomed saucepan, combine the butter, brown sugar, heavy cream, corn syrup, and salt; stir over medium heat until the sugar dissolves.
- Increase the heat to medium-high and bring the mixture to a boil, stirring occasionally, until a candy thermometer reads 245°F (118°C).
- Remove the saucepan from the heat and stir in the vanilla extract.
- Dip each apple into the hot caramel, turning to ensure an even coating, then allow any excess caramel to drip off.
- Place the coated apples on the prepared baking sheet and let them cool completely at room temperature or in the refrigerator until the caramel sets.


